最近在我的笔记本上用 WireGuardServerForWindows 项目搭了一个 WireGuard 服务端,但是发现一个问题,我一给 WireGuard 开网络共享,我就没法开 Wi-Fi 热点了
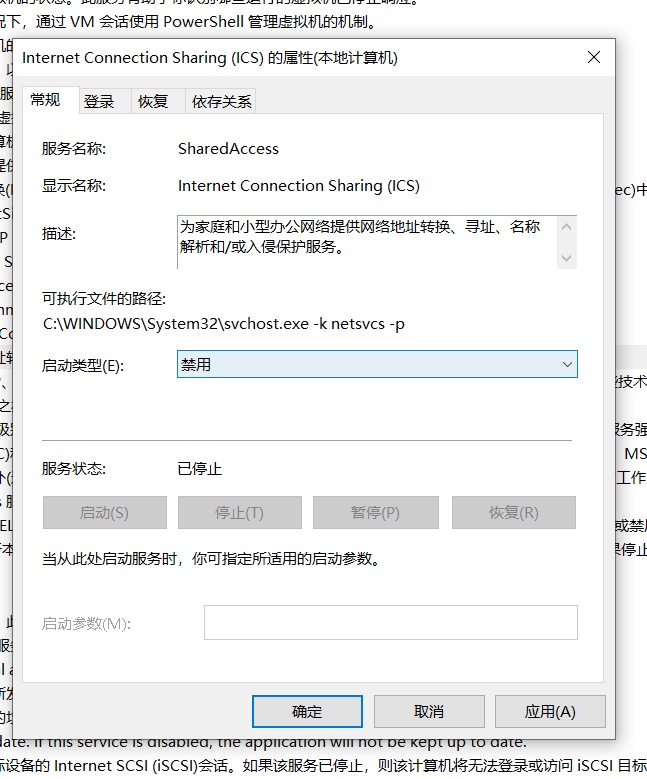
罪魁祸首:SharedAccess
目前的NAT的普遍做法是用 SharedAccess 服务,也就是你在控制面板看到的那个 “Internet 连接共享”
但是这个服务是针对热点的设计的,只能支持一个 NAT 实例,这意味着,由于SharedAccess服务已经被wireguard服务器的NAT占用掉了,你就没办法建立一个有 Internet 的 Wi-Fi热点
但是,如果,使用New-NetNat命令,就能够设置许多NAT实例,同时可以用热点。
方法
要求
Windows 10周年纪念更新(Windows 10 Anniversary Update)或以上版本
Hyper-V 已启用(但是如果你不想使用Hyper-V,你可以在经过个人测试,在 Win10 21H2 上不需要安装 Hyper-V 也可以使用bcdedit.exe中将hypervisorlaunchtype设置为off)
操作过程
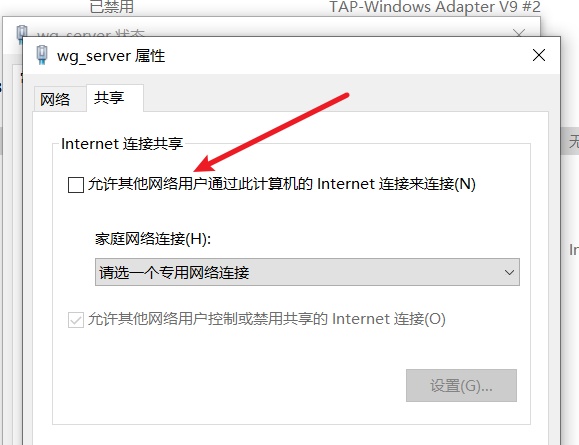
先关掉“Internet 连接共享”(把上图的钩去掉)
打开管理员 PowerShell
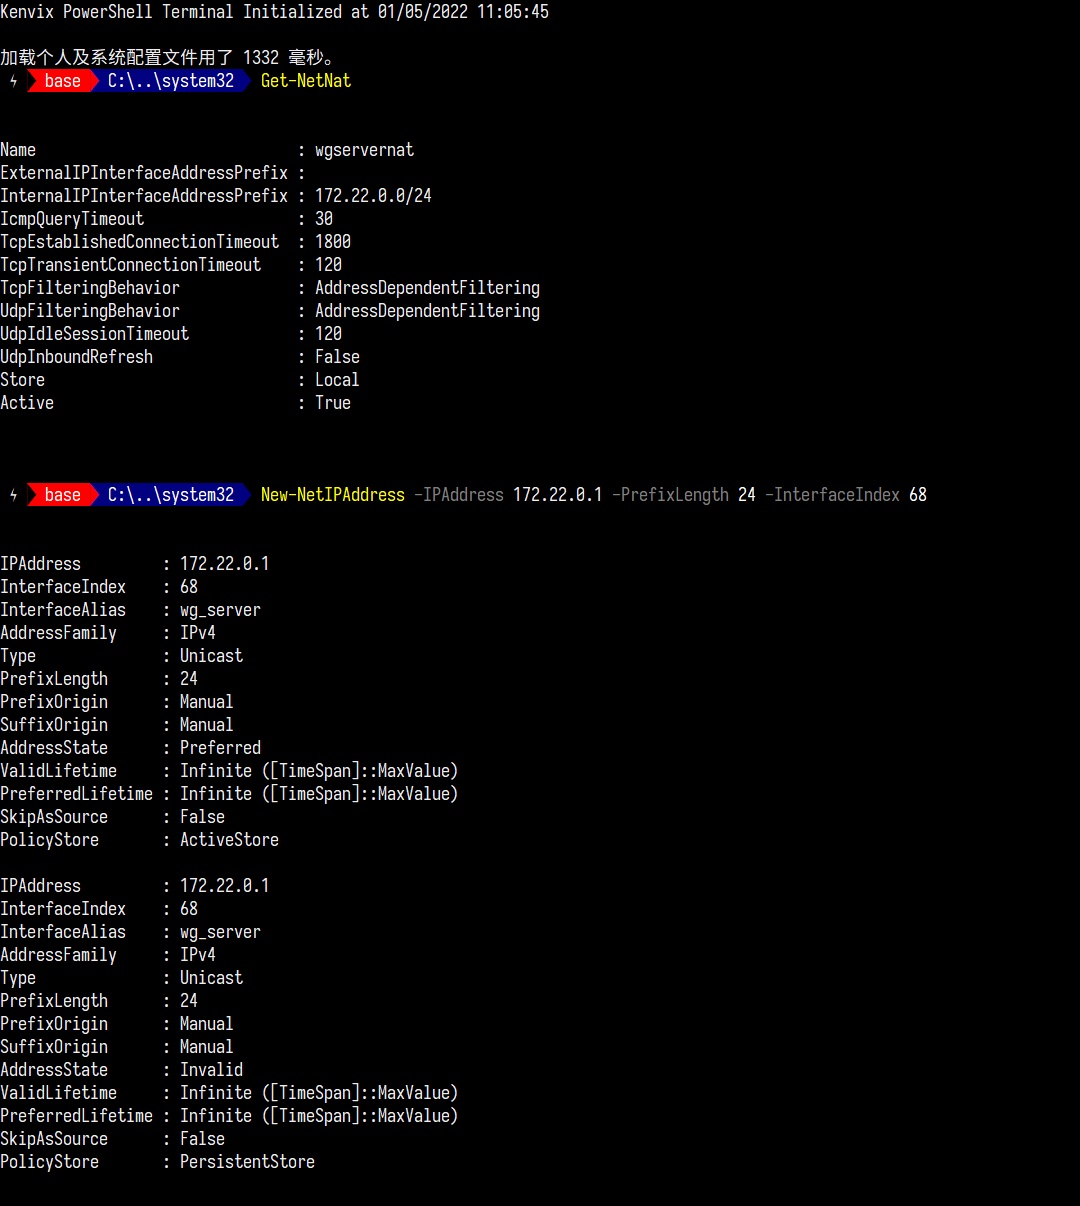
# 首先,找到你要设置的网卡的 InterfaceIndex,例如这里是 wg_server
Get-NetAdapter
# 给网卡 wg_server 设置 IP
New-NetIPAddress -IPAddress 172.22.0.1 -PrefixLength 24 -InterfaceIndex 68 # 68 是我的 wg_server 的 InterfaceIndex
# 添加 NAT
# Name: 设置 NAT的名称,随便起,我这里是 wgservernat。
# InternalIPInterfaceAddressPrefix: CIDR
New-NetNat -Name wgservernat -InternalIPInterfaceAddressPrefix 172.22.0.0/24
Get-NetNat
效果应该如图:
更多资料,请查看本文
请注意 New-NetIPAddress 每次重启都需要执行一次
附录
设置开机启动
New-NetIPAddress 每次重启都需要执行一次,可以用计划任务实现:
- 随便找个地方,新建
SetupWireGuardNat.ps1代码如下
#Requires -RunAsAdministrator

$ifName = "wg_server" # 修改为网卡名称

function Get-IfIndex() {
    return (Get-NetAdapter | Where -Property Status -eq 'Up' | Where -Property Name -Like $ifName | select -ExpandProperty ifIndex -first 1)
}

$ifIndex = Get-IfIndex

while ( $ifIndex -eq $null -Or $ifIndex  -eq "" ) {
    echo "Waiting interface $ifName up ..."
    sleep 3s
    $ifIndex = Get-IfIndex
}

echo "$ifName Interface index is $ifIndex"
echo "Setting up IpAddr"
New-NetIPAddress -IPAddress 172.22.0.1 -PrefixLength 24 -InterfaceIndex $ifIndex
exit 0
用户修改为 SYSTEM
勾选“使用最高权限运行”
触发器为 在系统启动时
操作为 启动程序,程序或脚本为 powershell.exe,参数为:
-NonInteractive -NoLogo -NoProfile -File "脚本路径"
例如
-NonInteractive -NoLogo -NoProfile -File "C:\Work-Station\Scripts\SetupWireGuardNat.ps1"
测试
出于测试目的,可以禁用SharedAccess服务,可以发现NAT仍在运行: